Before adding a component you need to add items in the item master form.
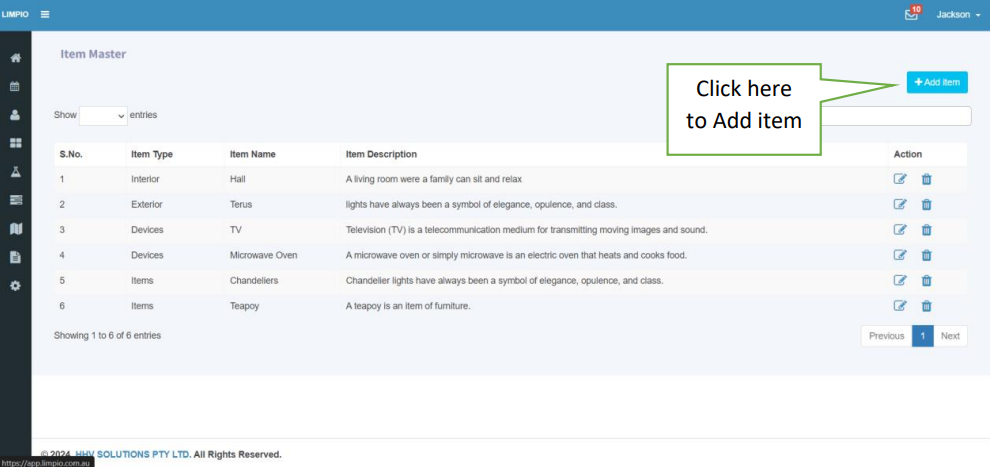
Item Master
To add Components or Item click the add item button on the right side
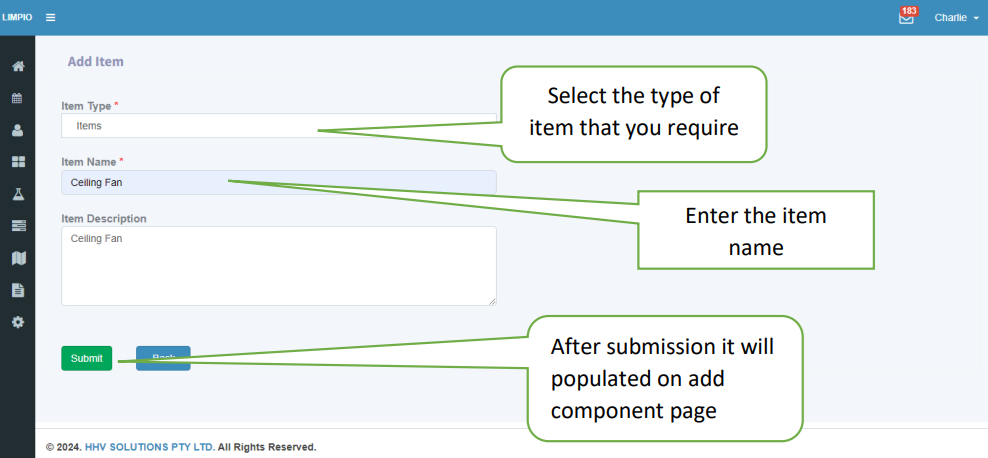
Item Type Selection:
On the “Add Item” page, the first step is to select the “Item Type” from the options: “Interior,” “Exterior,” “Device,” or “Item.” Populating “Components” or “Item Name”:
If you choose “Interior” or “Exterior,” this selection will auto-populate on the “Components” section of the “Add Component” page.
If you select “Device” or “Item,” it will populate in the “Item Name” field on the “Add Component” page.
Item Name Entry:
In the "Item Name" field, enter the name of the item based on the "Item Type" you selected.
Item Description:
In the "Item Description" field, provide a detailed description of the item.
Submit and View List:
After completing the item details, click the "Submit" button, you will be redirected to the list page.
List Page:
On the list page, you can view the item you added.
If needed, you can also edit the item from this page.
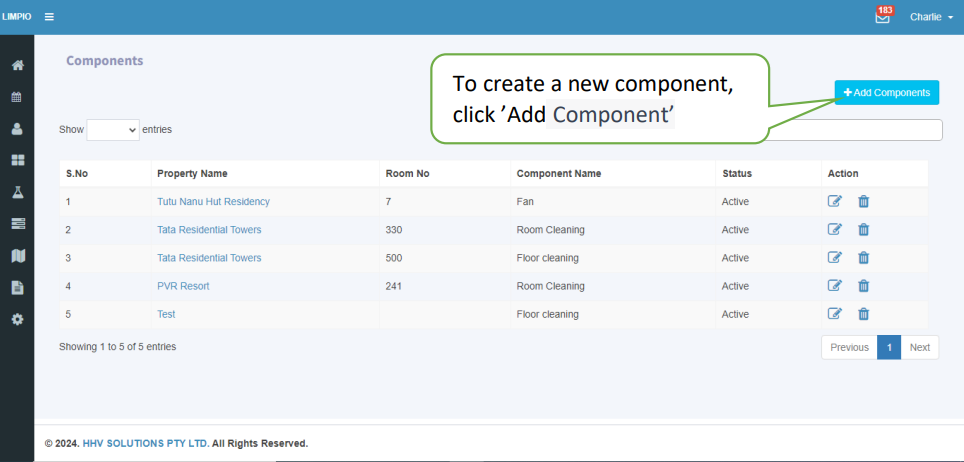
Add Components
To add components click the add components in the right side of the components page
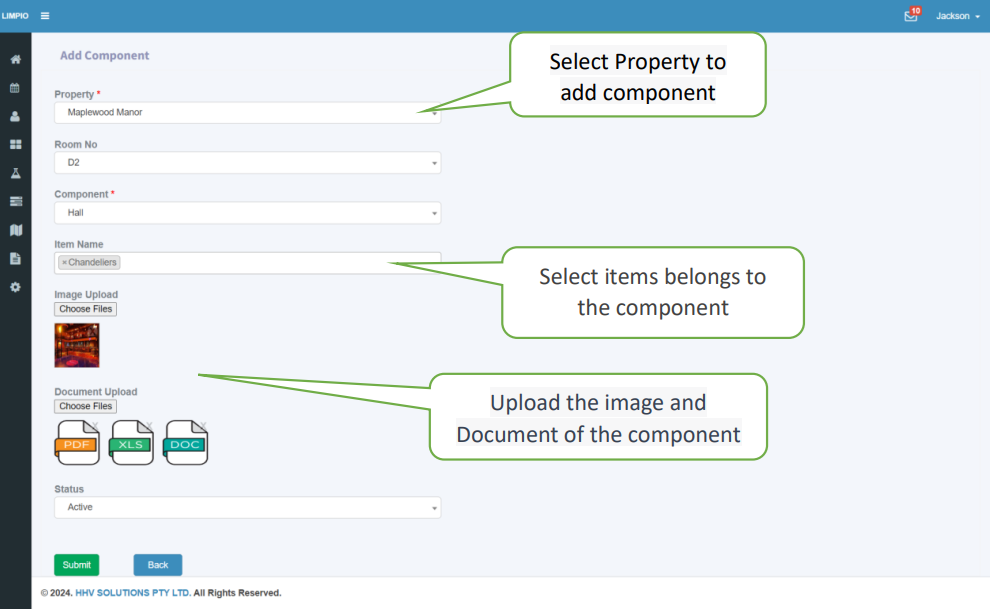
Select Property
Choose the property populated from property master
Component:
In the components dropdown list, items are populated from the Item Master for items
categorized as 'Interior' and 'Exterior’
Item Name:
In the "Item Name" dropdown list, items are populated from the Item Master if they are
categorized as 'Item' or 'Device.'
Photo:
Upload images related to the property, component, or item.
Upload Documents:
Attach documents associated with the property, component, or item.
Status
The default status is 'Active,' and you have the option to select 'Archive' or 'Inactive'.
Submission and List View:
After entering the group details, click the "Submit" button, you will then be directed to the list
page.
List Page:
On this page, you can view the Components you created.
If necessary, you can also edit the Components from this page.
Before creating Quotation we need to create master form such as Commission and GST
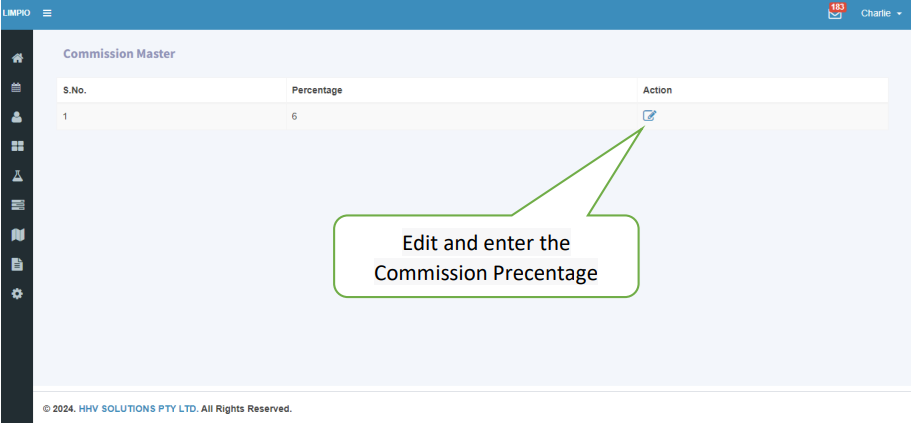
Commission Master
Enter the commission percentage in the field. You cannot add the commission in the list; instead, you can edit and save the changes.
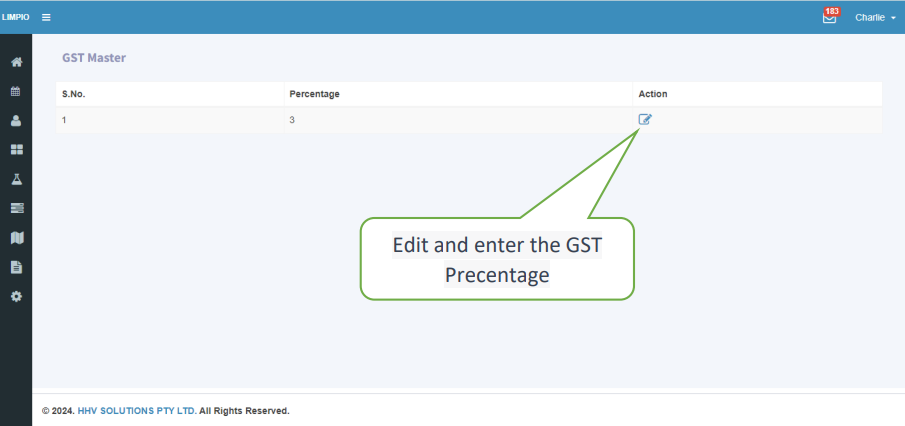
Gst Master
Enter the GST percentage in the field. You cannot add the GST in the list; instead, you can edit and save the changes.
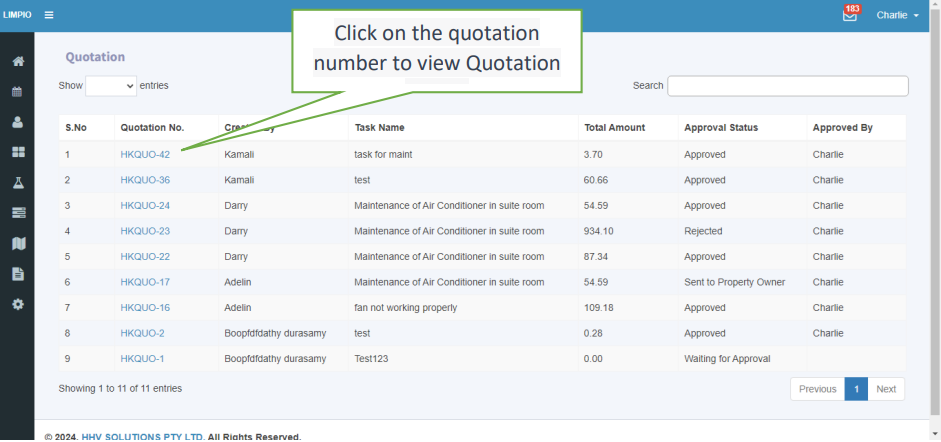
Quotation
The quotation generated by the service provider will populate in the quotation list. Clicking on the quotation number will display the detailed page, where the quotation can be Approve, Reject are Forward to property owner by Organization Admin.
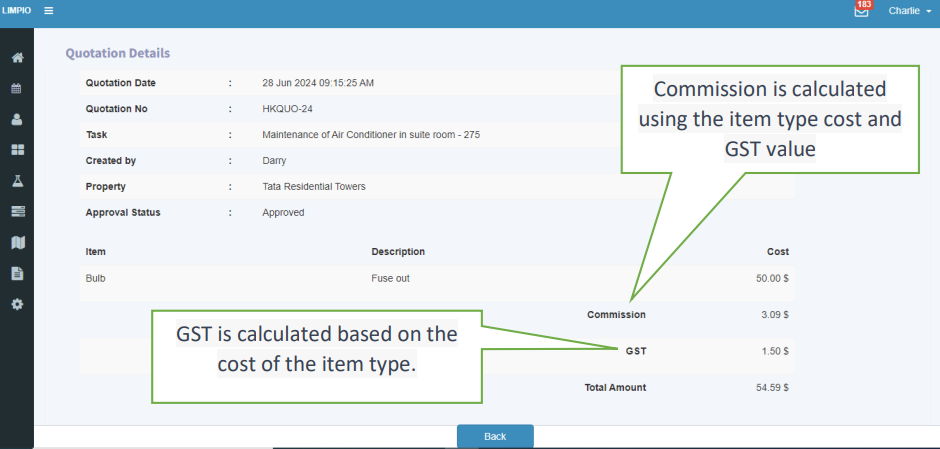
The quotation generated by the service provider will populate in the quotation list. Clicking on the quotation number will display the detailed page, where the GST and commission values are calculated based on the item type cost, and the total value is presented.